Level Up Your Messaging Game: Send Engaging Auth Emails with Stytch and Enveloop
As developers, we spend a lot of time working on our apps, trying to ensure our users' experience is positive and tailored to their needs. When your users or potential customers visit your site:
- Is it clear what they need to do and are those steps minimal?
- Is the experience fast and effortless?
- Do you have consistent and familiar design and branding at all the touch points?
All these characteristics drive the simplicity your users need to ensure they're successful opening the front door and on the right path. That said, the best impression we need to make is often the first impression.
That first impression is often the Sign Up / Login / Authentication interaction.
In this article, we are going to dive into blending two powerful tools together, Stytch and Enveloop, and demonstrate how easy it can be for you to tighten up this inteaction and send optimized, designed, and easy-to-use welcome/invite authentication "magic link" emails to your users.
Starting out with Stytch and Enveloop
First, we'll spend some time talking about the process, describing the various technologies and services we'll use. Then, we'll provide you with all the code you'll need to get everything running smoothly.
Authentication: Stytch
Stytch's authentication platform and flexible API and SDK’s let developers build secure, intuitive login flows your customers will love, with tools your team will thank you for.
At Enveloop, we're big fans of Stytch!
Messaging: Enveloop
Enveloop's message builder and simple API and SDK's allow developers to easily send and log emails, texts, and more for their web and mobile applications. Our team is passionate about empowering developers to send better messages with increase deliverability.
If you haven't signed up for Stytch or Enveloop, now is a great time to do this! 😎
Ok, let's get started!
So, what are magic links?
To allow your users to authenticate to your app via Stytch, we'll be using Magic Links.
Magic Links, one of Stytch’s many auth products, provide users with a frictionless and passwordless login experience. Magic Links are essentially single-use login URLs that can be embedded in communications like email. They’re quick, easy, and flexible to implement.
Stytch has an Email Magic Link product that sends emails, which include the Magic Link that authenticates a user to your app and establishes a session. By default, you can use this option.
However, there are reasons why you and your team would want greater control over these authentication emails. They include:
- You may already have a email provider set up (SendGrid, Mailgun, Postmark, etc.) and you want all messaging to issue through your domains at these providers.
- You want better design/branding/content control over the authentication emails that are sent to your new and existing users.
By using Enveloop to send your emails and Stytch’s Embeddable Magic Links, you get the best of both worlds – seamless authentication for your users and full control of your email templates to maintain a consistent login experience for your users.
Now that you know why you'd want to combine these services, let's show you how to make it happen!
Create a message template in Enveloop
We'll start out by logging into Enveloop and creating a new "Magic Link Login" template. To do this inside a project:
- Select Add Template.
- Choose to create an Email template.
- From the gallery, based on a design, choose Magic Link Login template.
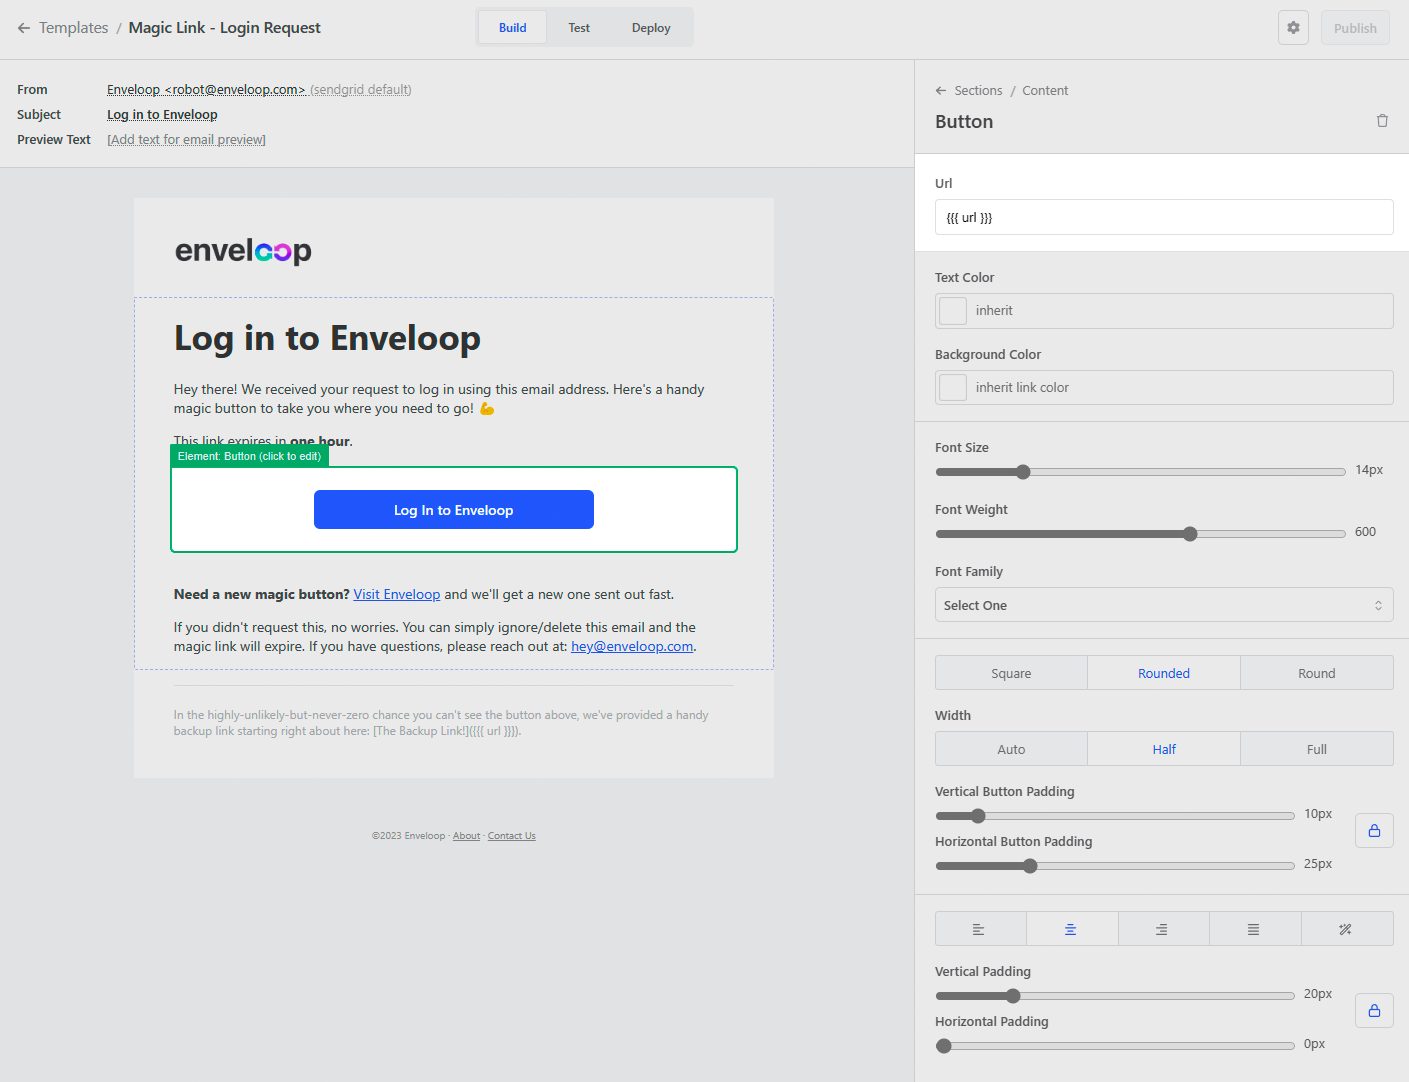
Starting with a pre-designed and coded template from Enveloop is a great way to save yourself a lot of work as a developer. You can choose a basic template or one that includes more color and style.
In the template layout, you'll notice a button. Clicking on the button, you'll notice that the value of the Url field is set to {{{ url }}}, a variable. This is Mustache syntax -- we'll show a bit later how this variable will tie into Stytch and the call to the Enveloop API to send the message.
Perfect! Now that we have an email template to use, we can dive into Stytch to create an Embeddable Magic Link.
Create an Embeddable Magic Link token using Stytch
Now that the message template is set up in Enveloop, let's focus on how to create the Embeddable Magic Link token that will be called in the {{{ url }}}variable that's assigned to the Log In button in our message template.
We'll show the steps you'll need to take to do this and then show code examples for this effort using NodeJS.
Step 1: Find a Stytch User Based on Email Address
Before generating a token, which takes a Stytch user_id, we'll need to find the user we want to create the Magic Link for. To look up an existing Stytch user based on email address, you will need to use the Search Users endpoint. To create a new user in Stytch, you will need to use the Create User endpoint.
Step 2: Generate an Embeddable Magic Link Token for the User
To generate the Embeddable Magic Link token, call the Create Magic Link endpoint from the Stytch API.
Use the token in the Create Magic Link response to create a URL to pass to your Enveloop email template. The redirect URL should looks something like this:
https://yourapp.com/auth?token=MAGIC_LINK_TOKEN&stytch_token_type=magic_links
We'll pass this to the {{{ url }}} variable when sending your email with Enveloop and calling the Enveloop API.
Step 3: Authenticate the Embeddable Magic Link Token when the User clicks to log in
Call the Stytch Authenticate Magic Link endpoint to redeem the token. And that’s it! You now have a beautiful custom login email from Enveloop, powered by Stytch authentication.
Ok, so let's see how the code for this would look
Now, the code!
Using the steps outlined above, here is an example of how that interaction would look in NodeJS and Express, using the Stytch SDK and the Enveloop SDK for NodeJS:
Set Up Stytch and Enveloop Clients
const stytch = require('stytch')
const stytchBase = process.env.NODE_ENV === 'production' ? stytch.envs.live : stytch.envs.test
const stytchClient = new stytch.Client({
  project_id: process.env.STYTCH_PROJECT_ID,
  secret: process.env.STYTCH_SECRET_KEY,
  env: stytchBase,
})

const Enveloop = require('enveloop')
const enveloop = new Enveloop({ apiKey: process.env.ENVELOOP_API_TOKEN })
Use the Express Endpoint Function to Handle Form Submission
const sendMagicLink = async (req, res) => {
  const { email } = req.body
  if (!email) return res.status(401).send({ error: 'No email provided' })

  try{
    // find user in our system by email address
    let user = await User.findOne({ where: { email } })

    if (!user) { // create user if none exist
      user = await User.create({ email })
    }

    // set the external Stytch foreign key to user_id on Stytch
    if (!user.stytchId) {
      const { results } = await stytchClient.users.search({
        limit: 1,
        cursor: '',
        query: {
          operator: stytch.UserSearchOperator.AND,
          operands: [
            {
              filter_name: 'email_address',
              filter_value: [email],
            },
          ],
        },
      })

      // use the user_id of the found user or create a new user with the email
      const { user_id } = results.length ? results[0] : (await stytchClient.users.create({ email }))

      // update local user with user_id from Stytch
      user = await user.update({ stytchId: user_id })
    }

    // create the MagicLink token
    const { status_code: status, token } = await stytchClient.magicLinks.create({ user_id: user.stytchId })

    // if the token was successfully created, then send email with Enveloop
    if (status === 200) {
      await enveloop.sendMessage({
        to: user.email,
        template: 'magic-link',
        templateVariables: { url: `${process.env.STYTCH_REDIRECT_URL}?token=${token}&stytch_token_type=magic_links` },
      })
    }

    res.status(status).send({ status })
  } catch (err) {
    logError(err)
    const { status_code: status, error_message: error } = err

    if (status && error) {
      res.status(status).send({ status, error })
    } else {
      res.status(500).send(err)
    }
  }
}
You'll notice in the templateVariables key, we have a spot for our {{{ url }}} variable and the URL that we created earlier that includes the Embedded Magic Link token from Stytch.
Use the Express Endpoint Function for Authentication
const authenticateMagicLink = async (req, res) => {

	const urlQueryObject = url.parse(req.url, true).query;

	stytchClient.magicLinks.authenticate(urlQueryObject.token, {session_duration_minutes: 60})
	  .then(
		  // on success render the logged in view
      res.render("Welcome! You're logged in!")
    )
    .catch(err => {
	    res.status(500).send(err)
    });
	}
};
The final step is to set up an Express endpoint that authenticates the end user once they click on the URL from the email Enveloop delivered. Simply call the Authenticate Magic Link endpoint and pass in the Embeddable Magic Link token with an optional session duration.s And that’s it! The end user is logged in.
Wrapping up
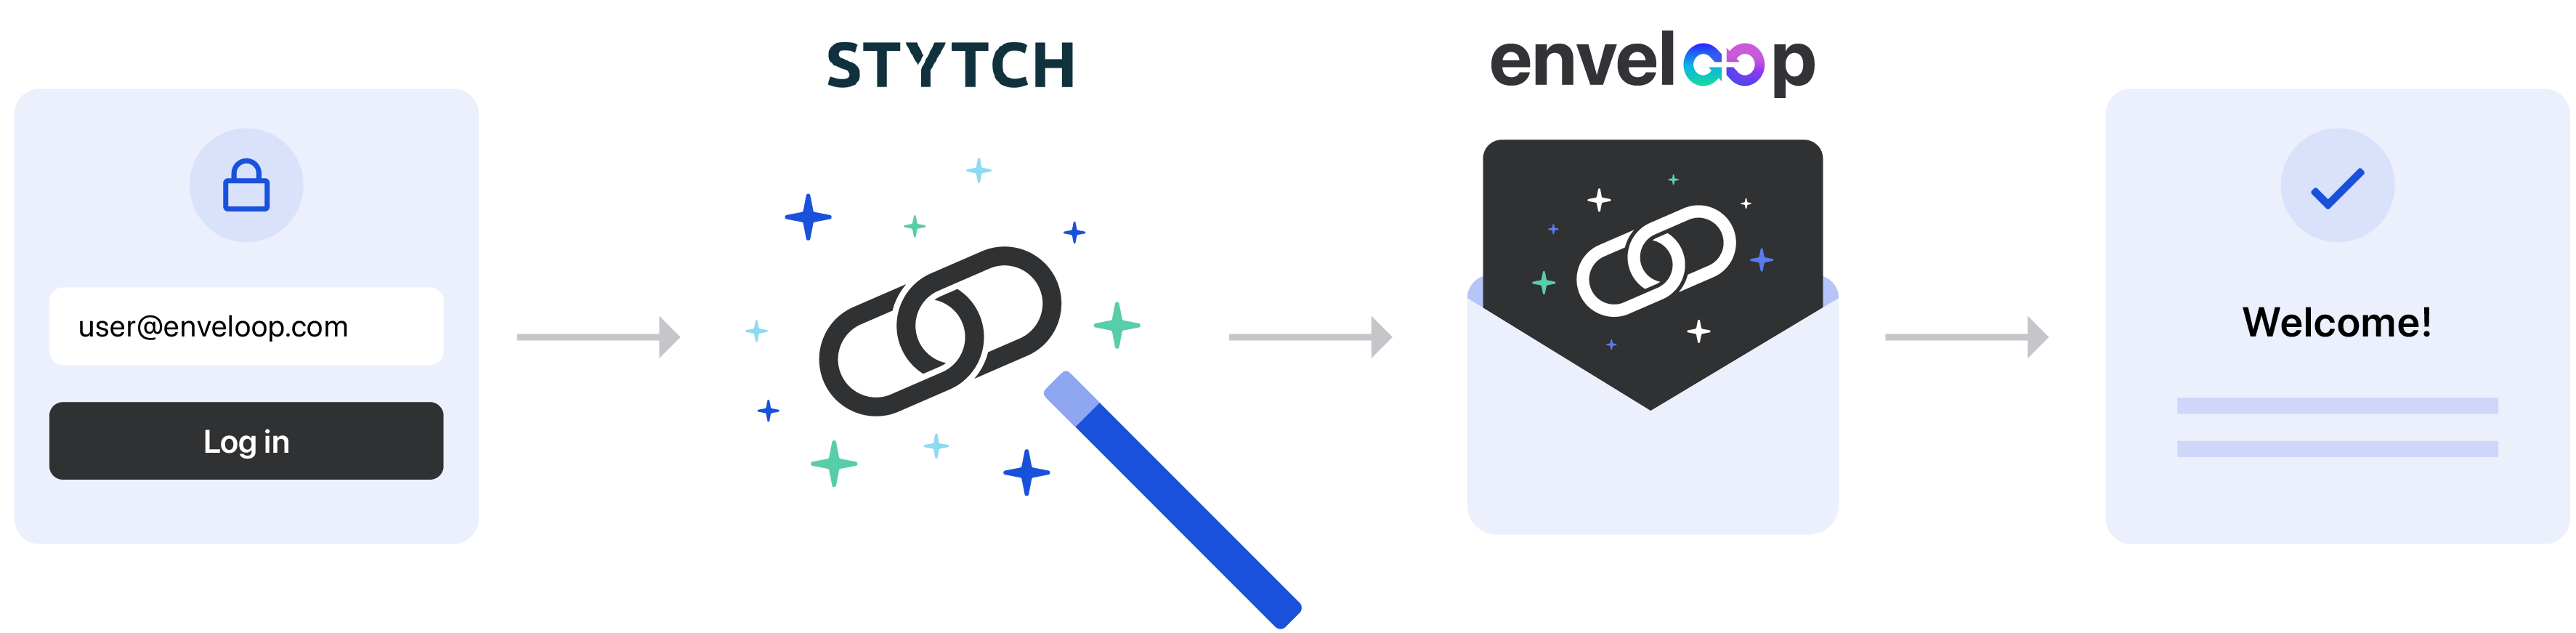
With Enveloop and Stytch, end users receive a Log In email that includes a button linked to the Embeddable Magic Link. With one click, the user is authenticated, provided a session, and granted access to your application — all without having to enter a password.
Stytch makes it easy for your users to authenticate. Enveloop makes it easy to send these messages to your users with design and branding that's on point. In the end, the user wins because they got a timely and beautiful experience. 🪄 ✨ Magic!✨